

Create a discount
A discount lowers what a customer pays at checkout. It is either a coupon code the customer
types in, or an automatic discount that applies by itself when the cart qualifies. This page
walks through making one. The example is a code, SUMMER20, that takes 20 percent off the whole
cart for December. The pictures use a demo store with made-up data.
Before you start
Section titled “Before you start”- You need the permission to manage store settings. Without it the Discounts page does not open.
- Only active discounts are applied at checkout, and the discount is calculated when the customer checks out, not when they add to the cart.
- For other shapes (buy X get Y, gift with purchase, bundles, “get N for a price”) see the type cards in step 2. Quantity breaks, spend tiers and bulk codes have their own page: Quantity breaks, tiers and coupon batches.
1. Open Discounts and select New discount
Section titled “1. Open Discounts and select New discount”Open Marketing in the admin sidebar, then Discounts. The list shows each discount with its code (if it has one), its type, its reward, how many times it has been redeemed and its status. Select New discount.
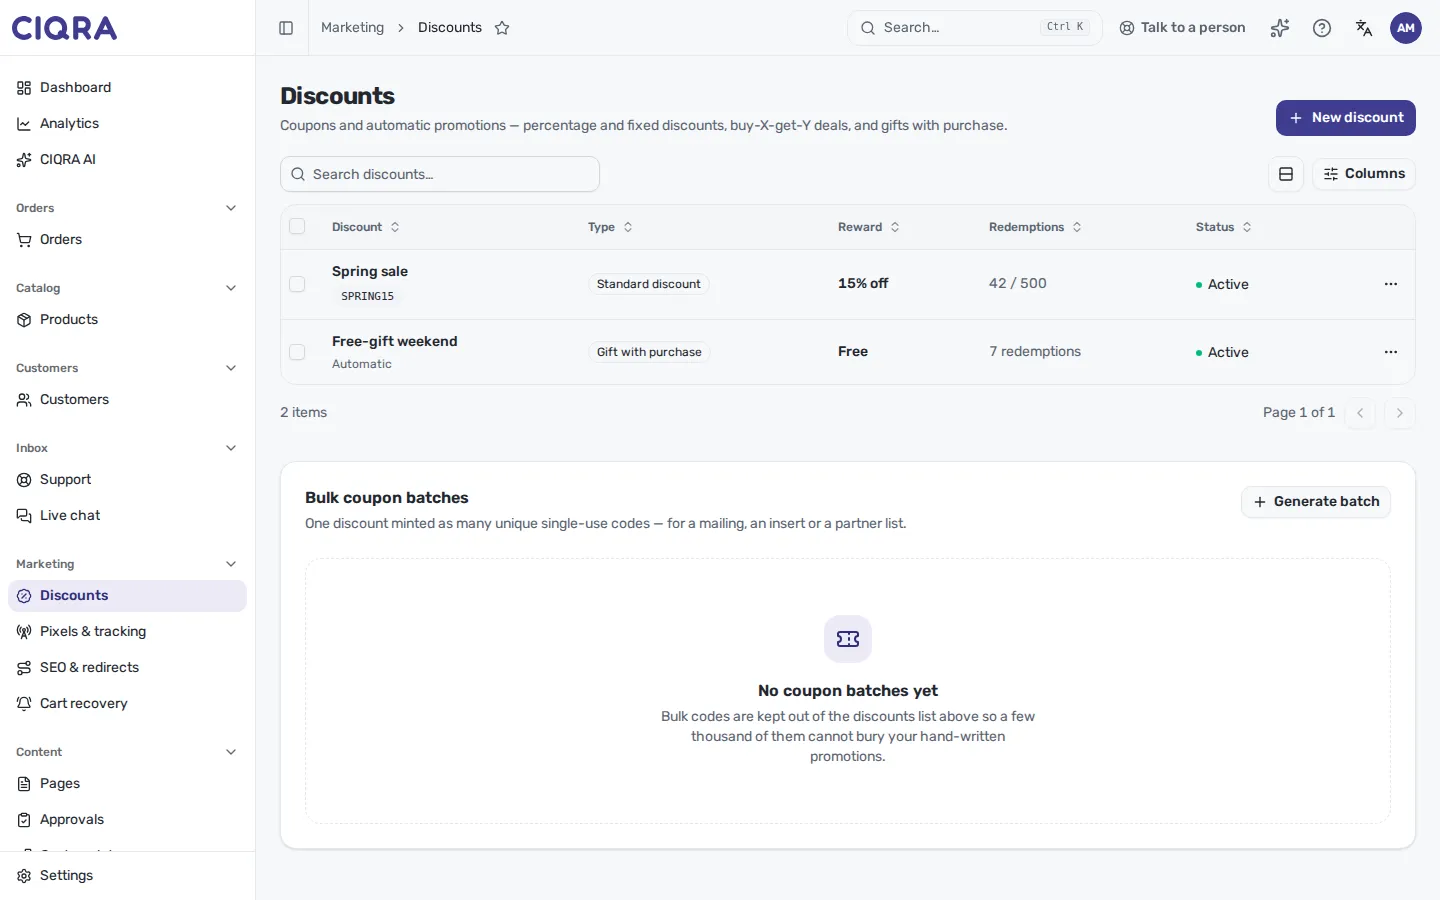
- 1New discountOpens the empty form.
- 2Existing discountsName, code, type, reward and redemptions. Select a name to edit it.
2. Choose the discount type
Section titled “2. Choose the discount type”The first card, Discount type, decides which fields the rest of the form shows.
| Type | What it does |
|---|---|
| Standard discount | A percentage or fixed amount off, optionally banded into spend tiers. |
| Buy X, get Y | Buy a number of items and get more at a reward. |
| Gift with purchase | Add a gift to the cart at a discount once the shopper qualifies. |
| Quantity break | Reward more as the unit count climbs. |
| Bundle | A buy-together deal across two product groups. |
| Get N for a price | Any group of items sells for one fixed price, for example “3 shirts for 300”. |
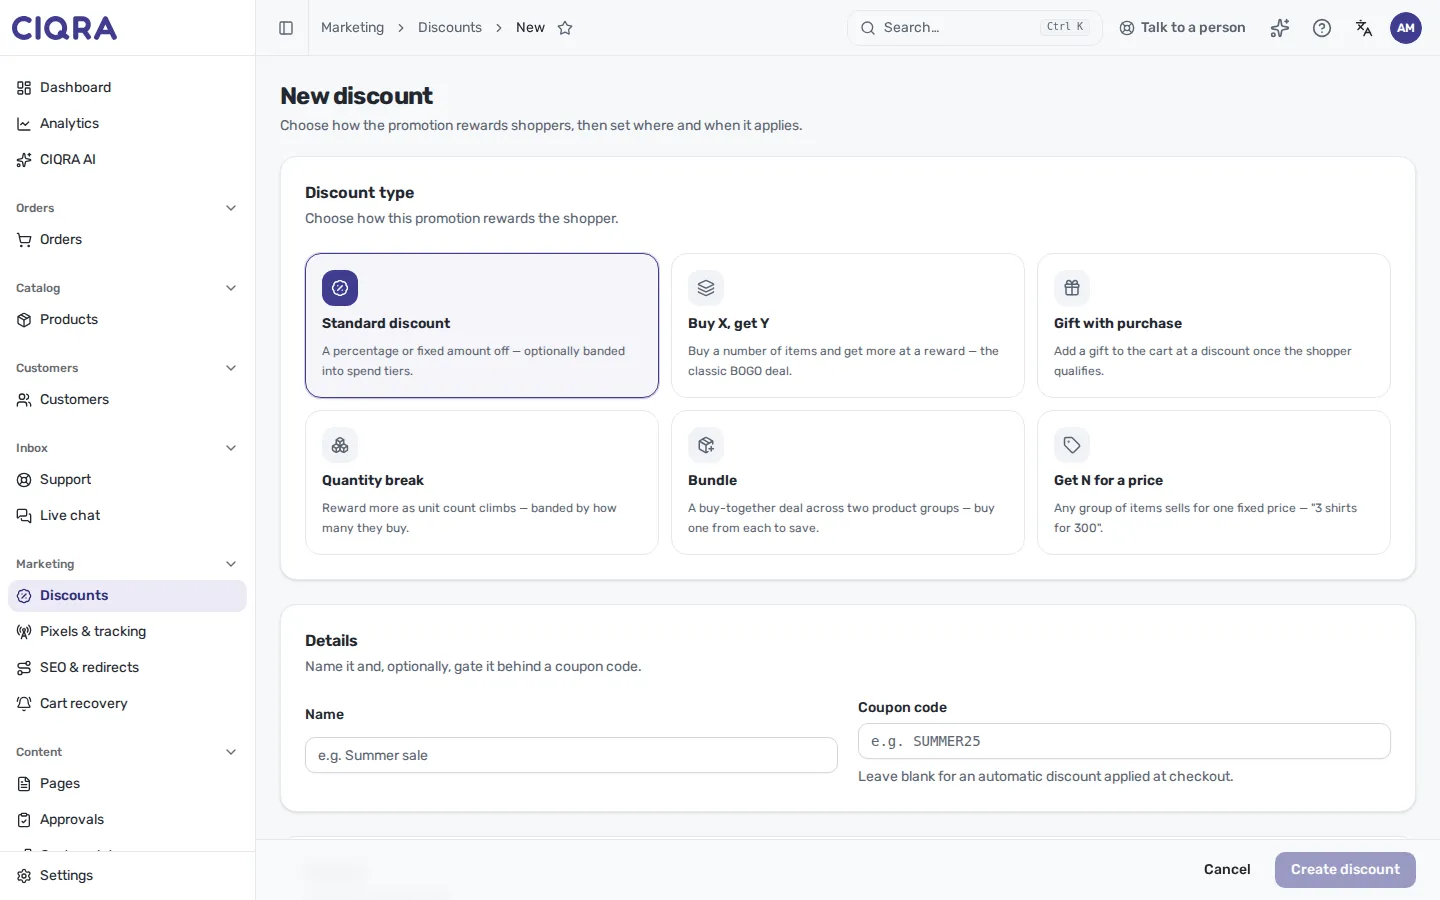
- 1Standard discountSelected by default. Use it for this walk-through.
- 2Other typesSelecting a card changes the Reward card below.
3. Name it, add a code and set the reward
Section titled “3. Name it, add a code and set the reward”Under Details, type a Name (only your team sees it) and, if you want a code, a Coupon code. Leave the code blank for an automatic discount applied at checkout. A code may contain letters, numbers, hyphens and underscores, and CIQRA stores it in capitals.
Under Reward, choose Percentage or Fixed amount and enter the value (Percentage off or Amount off). A percentage must be between 1 and 100. A fixed amount also asks for a Currency.
Under Targeting, Applies to is Entire cart by default. Choose Specific products, Categories or Collections to limit the discount, then pick the Targeted items. You can also set a Minimum spend.
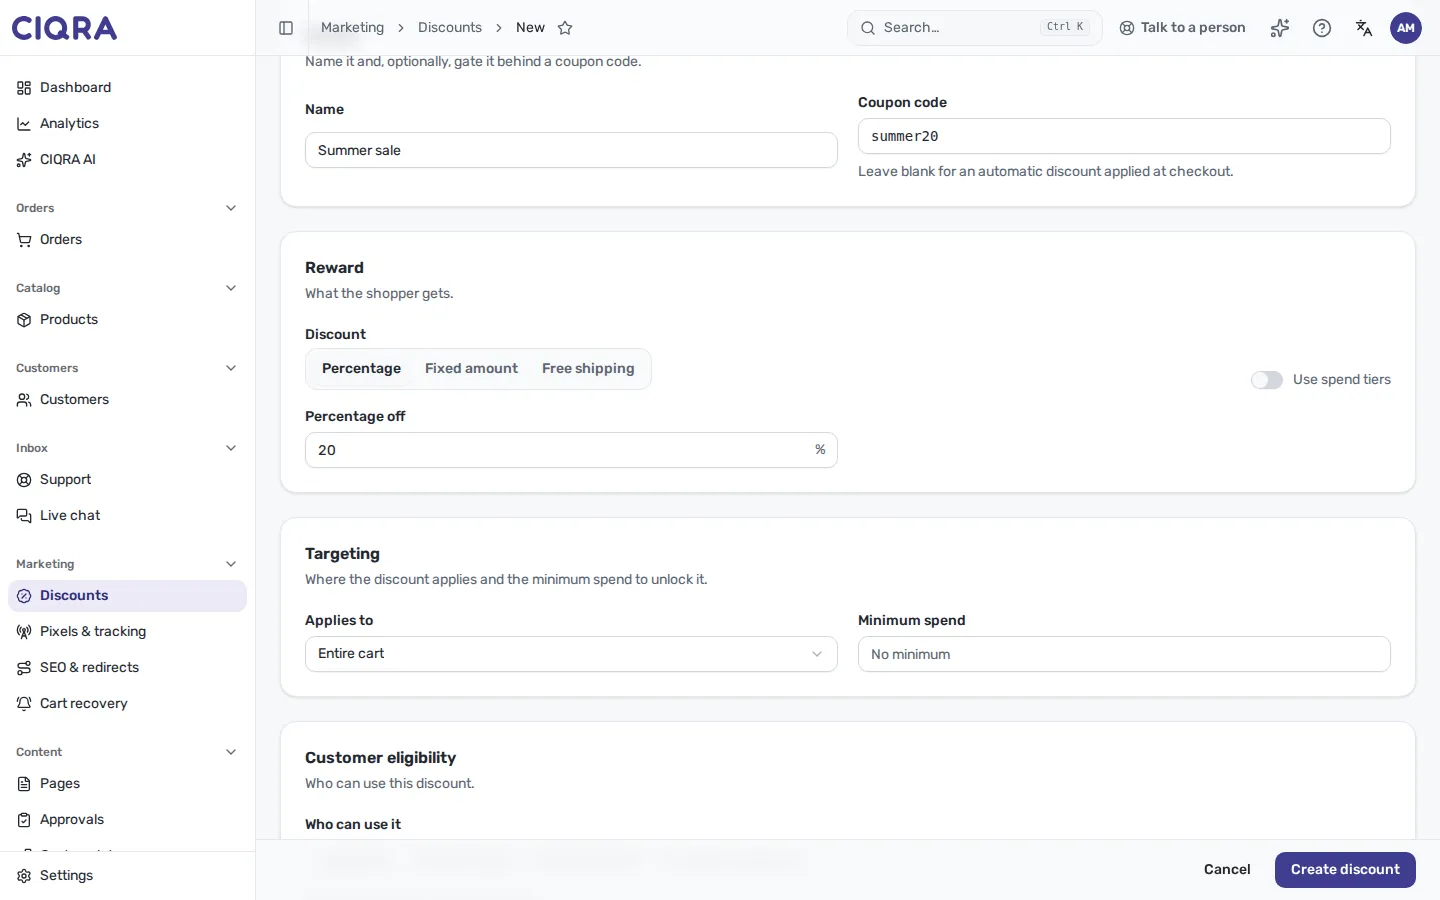
- 1Name and Coupon codeThe code is optional. Blank means an automatic discount.
- 2Percentage offThe reward. Switch to Fixed amount for a flat sum off.
4. Set the schedule and limits
Section titled “4. Set the schedule and limits”Under Schedule & limits:
- Starts and Ends set the window. The end must be after the start.
- Total usage limit caps how many times the discount can be used in all. Blank means unlimited.
- Per-customer limit caps uses per customer. Blank means unlimited. Both limits are whole numbers of 1 or more.
- Priority: lower numbers apply first when several discounts compete.
- Can combine with other discounts: when off, this discount does not stack with any other on the same order. It is off by default.
- Exclude products already on sale: items that already show a compare-at price above their price do not get this discount.
- Active: only active discounts apply at checkout. Turn it off to prepare a discount without launching it.
Some extra switches appear only when they make sense, for example Show the discounted price on product pages (display only, the cart charges the same either way) and Take the percentage off the regular price. Each switch explains itself under its label.
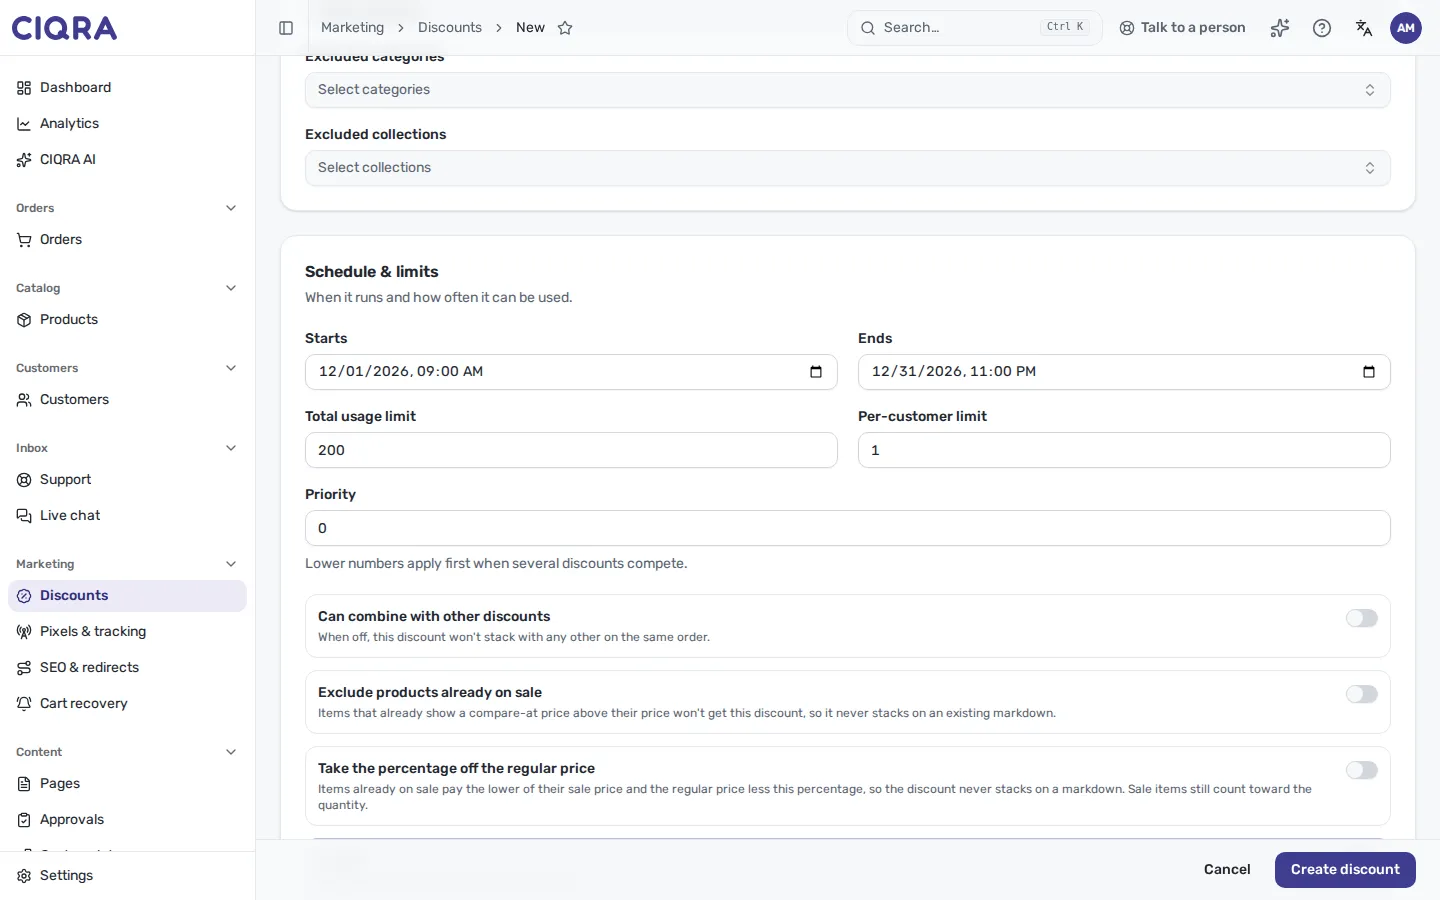
- 1Starts and EndsThe discount runs only inside this window.
- 2Usage limitsTotal and per customer.
- 3Can combine with other discountsOff by default, so one discount at a time.
5. Create the discount
Section titled “5. Create the discount”Select Create discount. A message says Discount created. and the discount opens for editing. Back in Discounts it is listed with its code.
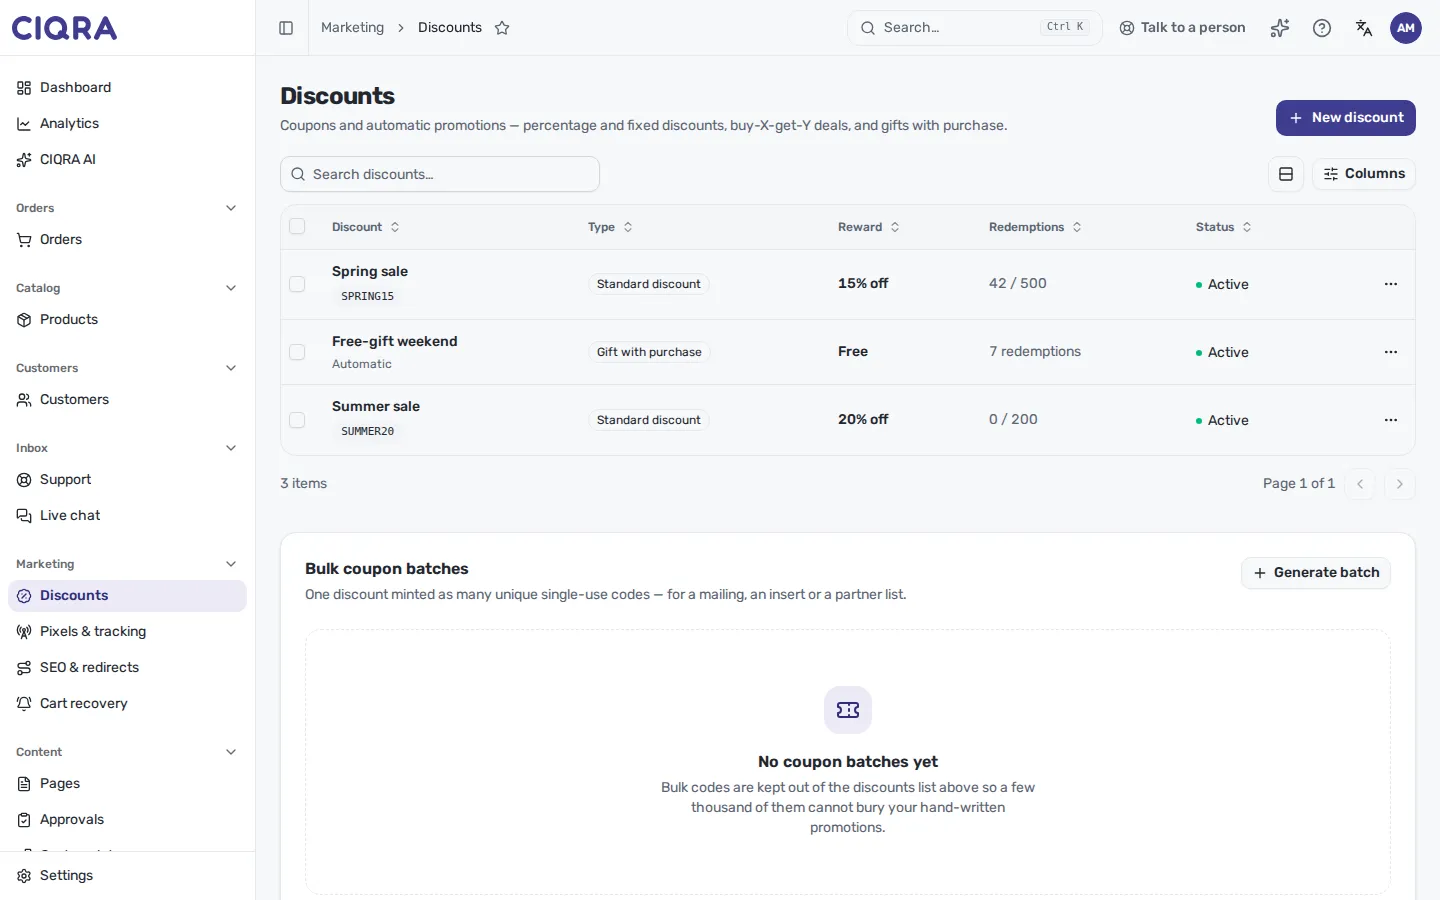
- 1The new discountName with its code underneath.
To change it later, select its name, edit, and select Save changes. To remove it, open it and select Delete. Orders already placed with it are not affected.
When it refuses
Section titled “When it refuses”The form checks your entries before sending, and the server checks them again. The messages you may meet:
- “Another promotion already uses this coupon code.” Choose a different code.
- “Select at least one item to target.” You chose products, categories or collections but picked none.
- “The end must be after the start.” Fix the dates.
- “Use letters, numbers, hyphens, or underscores.” The code has a space or a symbol.
- “Enter a percentage between 1 and 100.” The percentage is outside the range.
- “Enter a 3-letter currency code.” A fixed amount needs a currency.
What the customer sees
Section titled “What the customer sees”In the default theme the customer types the code in the Discount code box on the cart page and selects Apply; an automatic discount applies on its own. On the order, the amount shows as a Discount line in the order summary. See Discounts and promotions.
Good to know
Section titled “Good to know”- Deleting a discount does not change orders already placed with it.
- Codes made in a coupon batch are not listed in this table. Batches have their own panel on the same page.
- Whether a particular combination of discounts is applied together is decided by the checkout. This page does not list those rules; the Can combine with other discounts switch is the one you control.