

Write and manage blog posts
Your store’s blog is where you publish updates, launches, guides and the kind of storytelling that builds trust and brings shoppers back. You write and schedule articles right in the CIQRA admin, and they render on your storefront’s blog.
Open the Blog list
Section titled “Open the Blog list”In the sidebar, find the Content section and select Blog. This opens the list of every article in your store.
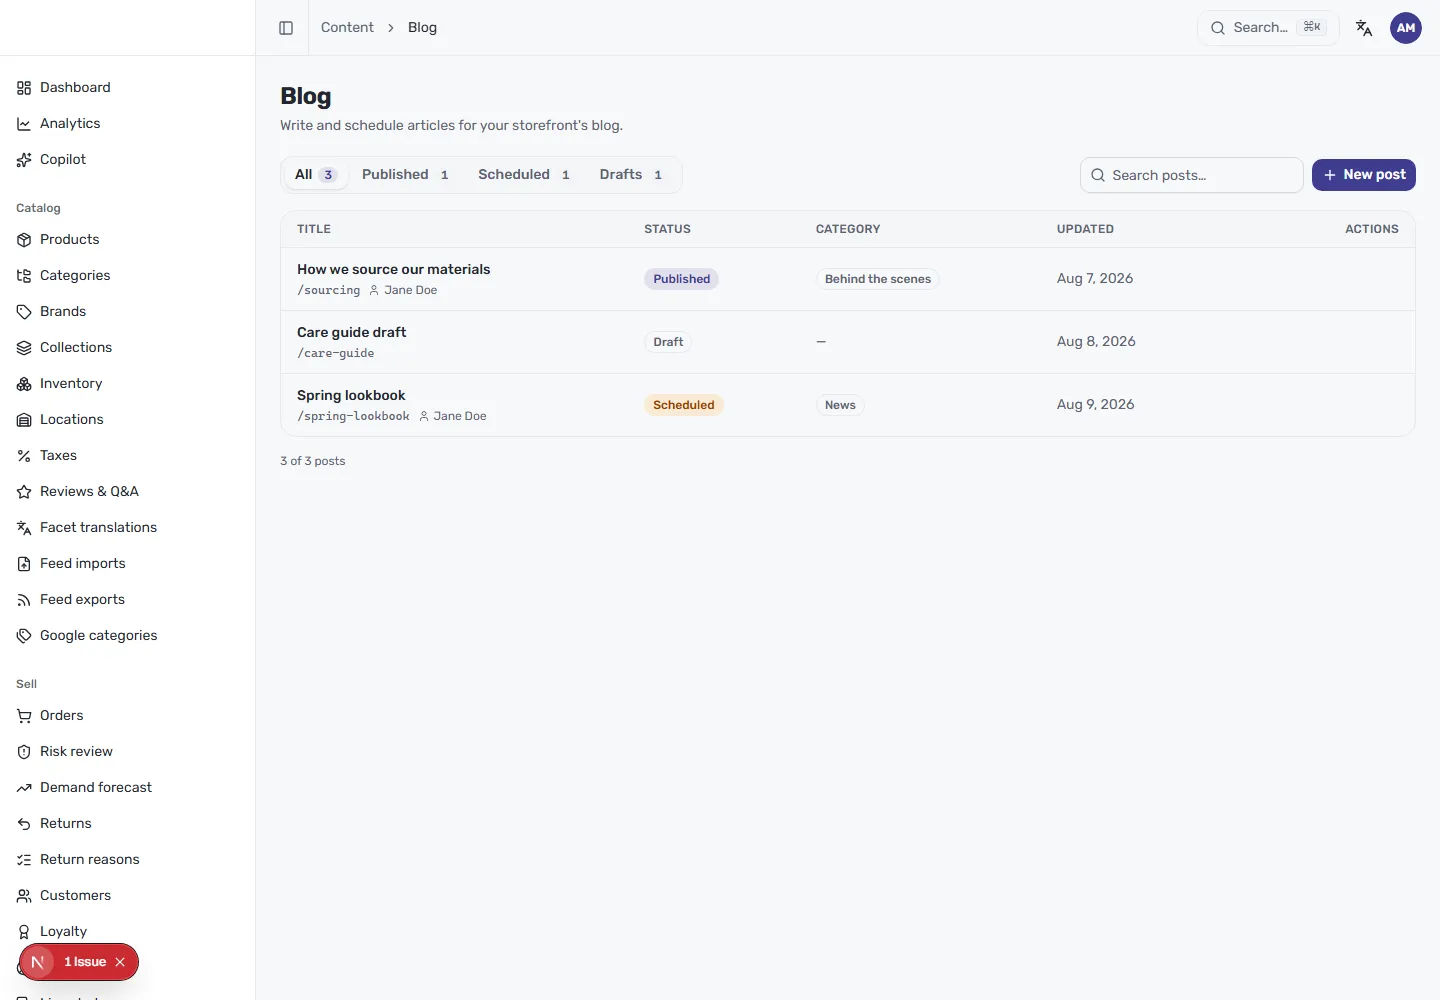
The list gives you a quick read on where each article stands:
- Status tabs across the top — All, Published, Scheduled and Drafts — filter the table, with a count next to each.
- Each row shows the post title and its slug (for example
/sourcing), its author byline, a status badge, the category it belongs to, and when it was last updated. - Search posts narrows a long list by title.
Write a new post
Section titled “Write a new post”Select New post in the top right to open the article editor.
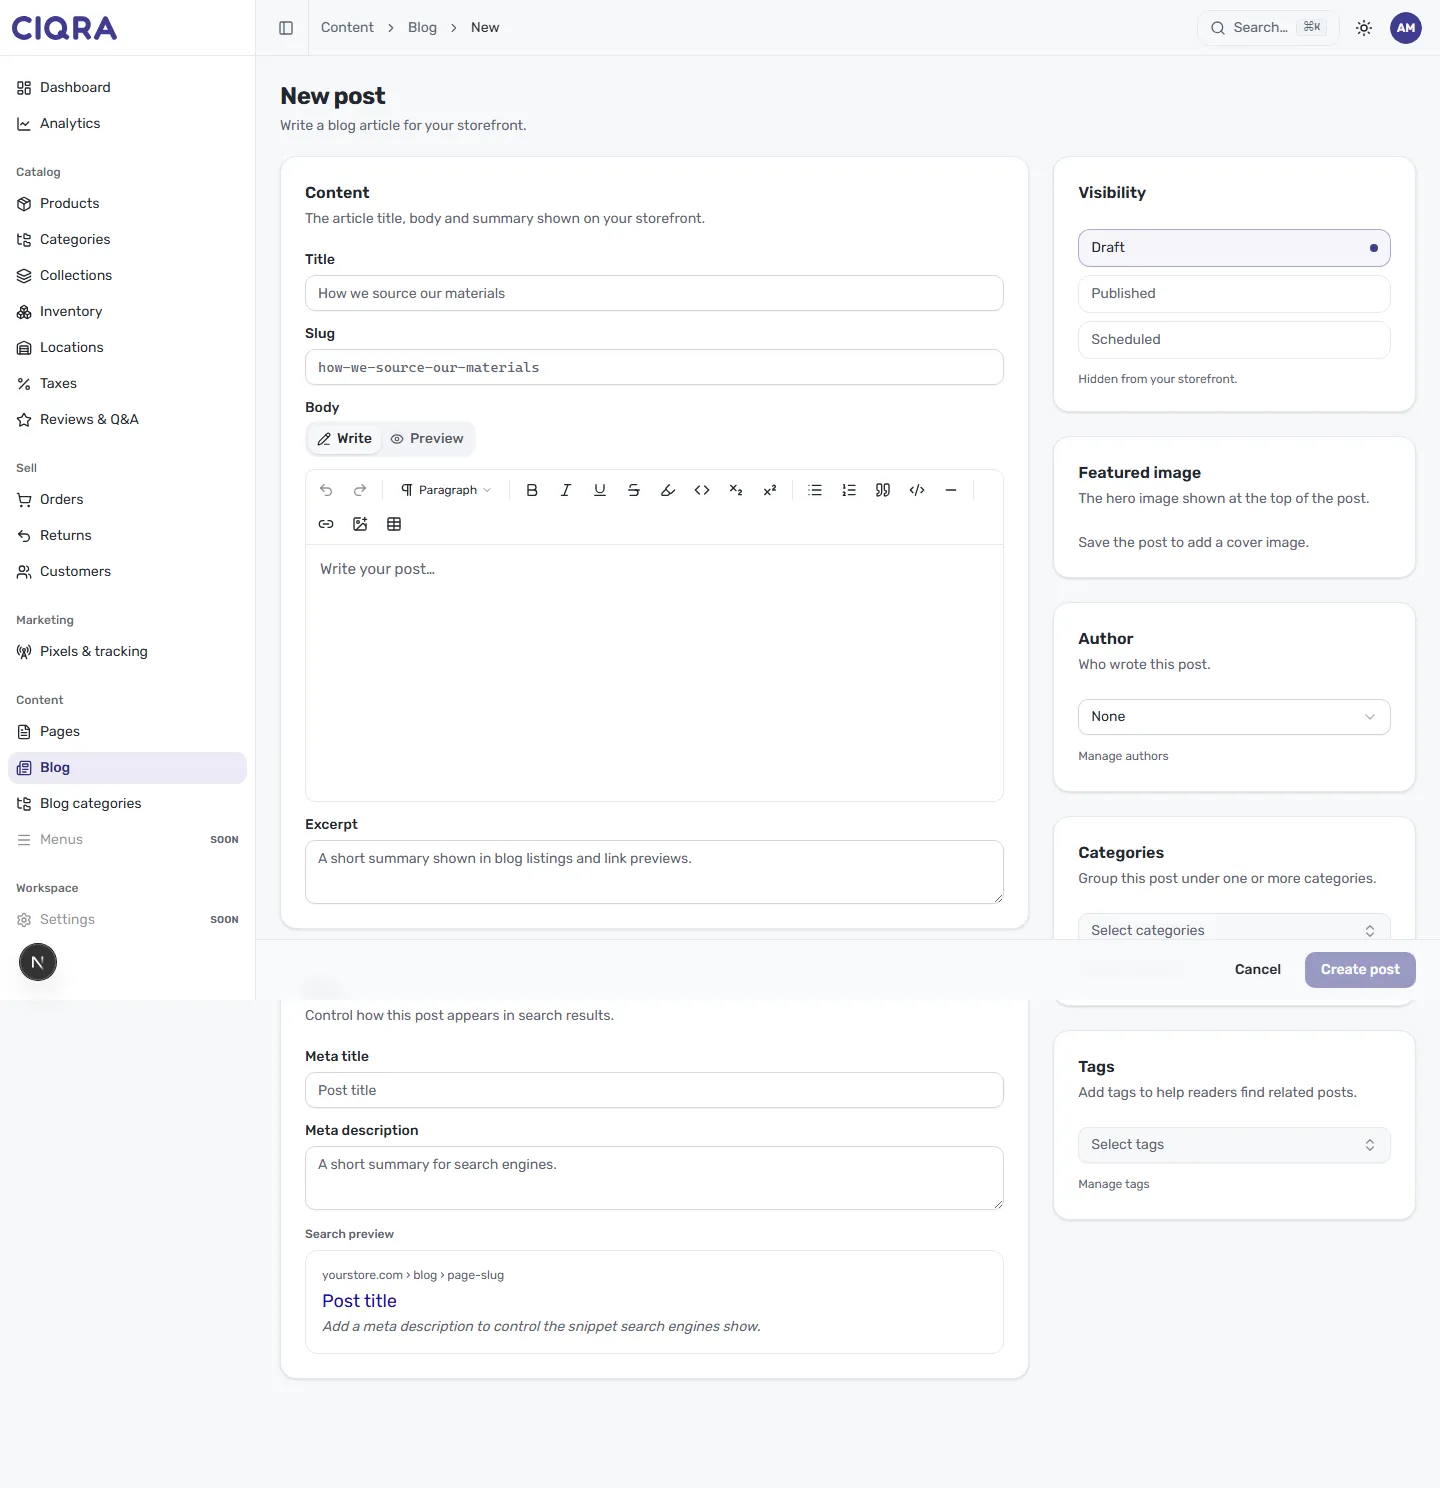
The main Content card holds the article itself:
- Title — the headline readers see, such as “How we source our materials”.
- Slug — the URL segment for the post. CIQRA suggests one from your title
(for example
how-we-source-our-materials), and you can edit it. - Body — write and format the article in the rich-text editor. Switch between Write and Preview to see how it will render. See The content editor for the full toolbar.
- Excerpt — a short summary shown in blog listings and link previews. Write it to make readers want to click through.
Set the byline and topics
Section titled “Set the byline and topics”The panels down the right side attach the post to the rest of your blog:
- Author — choose who wrote the post. Select Manage authors to add or edit bylines. See Manage blog authors.
- Categories — group the post under one or more categories. See Organise posts with categories.
- Tags — add lighter, cross-cutting labels so readers can find related posts. See Tag your posts.
Control search appearance
Section titled “Control search appearance”Below the body, an SEO section controls how the post appears in search results, with a Meta title, Meta description and a live Search preview of the snippet. Filling these in gives you deliberate control over the first impression in search — leave them empty and search engines fall back to your title and content.
Choose when it goes live
Section titled “Choose when it goes live”The Visibility panel controls whether the article is public:
- Draft keeps the post hidden from your storefront while you work on it.
- Published makes it live immediately.
- Scheduled publishes it automatically at a date you set.
Save the post
Section titled “Save the post”When you’re ready, select Create post. Your article joins the Blog list, where you can reopen it any time to edit, reschedule, or change its status.